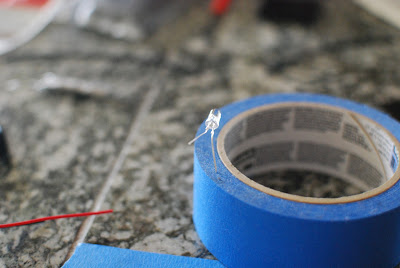
I'm sure this is the moment you've all been waiting for! LED wiring for the Infinity Gauntlet. First off I want to give a big thanks to my friend Ron for helping me clean up the LEDs. And also for teaching me about lemons! I'll get more to that later. Before I start with the step by step tutorial, I have to let everyone know that going into this project I had no knowledge LEDs, resistors, wiring, etc except what I have learned and forgotten from high school and college. So even if you have no knowledge of wiring up LEDs, I'm hoping that with this tutorial, safety, and a little bit of practice, you too can have LEDs to light up your infinity gauntlet.
What you'll need (not all items pictured):
- Soldering Tool Kit
(Should have Iron, soldering wire at minimum)
- 6 white LEDs (Radio Shack #276-0320)
- 6 resistors (160-Ohm 1/4 Watt Carbon Film Resistors) They come in a 5 pack...
- 1 AAA qty4 holder with on/off switch included
- Lemon juice aka Citric Acid Flux
- Wire cutters
- Hookup Wires (Red - Positive & Black - Negative)
Optional
- Electrical tape
- Heat Shrinkable Wire Wrap
(I highly recommend this since it helps keeps the wires clean)
- Wire Stripper/Crimper
Here are the Youtube videos that I believe will be helpful for you:
Series and Parallel Circuits (I didn't watch this until I messed up the circuit so make sure you watch this first!)
LED Tutorial - Part 1
How and WHY to Solder Correctly
Alright, a little disclaimer before we start (sorry, so many "before we start" statement in this post) I soldered the wires into a series first before I realized it really needed to be in a parallel circuit so the photos reflect that. You can read through but in the end you will eventually see what it needs to look like. Also, if you're using the heat shrink wraps you can cut them into smaller pieces but don't forget to slide it onto the wire before you solder the parts. And lemon juice does wonders. Lemon juice acts as a flux which allows for the soldering to seep into and around the individual wires and not just sit on top of the wires. It'll help create that stronger connection you need.
This is what the correct LED series circuit should look like. Or something close to it....Notice how short the wires are and how close the LED & resistors connect with the wires.
Okay, so you have 2 legs on the LED. The long wire on the LED is you positive wire. Positive wires match up with RED wires.
I didn't have another hand so I improvised. You probably want something to hold the LEDs stable while soldering.
{{These steps are not the right order. You can read them because they may be helpful overall, but this is not the proper set up. }} Dip your wire in the lemon juice and then connect the positive (long) wire of the LED to the Red wire coming from your battery pack. Jump down a couple of photos to see the right steps to take to extend your red wire. Next connect a resistor. And when I say connect I mean solder. Don't be afraid to cut the wires of the resistor. Just leave enough to solder a connection.
Test your connections to see if it light up.
DO NOT do this. In this picture you can see that I connected resistor to the next LED. This is a series circut. The 4 batteries will only light up 3 LEDs in a series. This is why you have to have it in a parallel circuit.
So starting back at square 1... solder on the wire cables to connect to the battery pack. Then start making cuts with your stripping tool. I didn't have one so I used scissors which also worked. Not pictured, but it will help if you line the wire up against the glove and mark/make the cuts where you plan to have the gems lined up. The center piece will be tricky, but you basically want to connect a a short wire in the same soldering connection to your longer wire.
Do this to both the red and black wires.
This is how I connected my LEDs in parallel. The photo above was after Ron took everything apart and re-soldered it. So you can see how wide I have it and see that it doesn't have to be that wide. Try to keep the wires as short as possible. And always test the lights after each LED is solder on to make sure it works.
Continue with all LEDs. Don't forget to leave some extra space for the thumb!
My first test of LEDs and gems!
Here's the final layout of the LED set up. LED closest to the battery pack is the center piece. Then above are the 4 knuckle pieces and to the far top right is the thumb piece.
All lit up!
Finishing this post at 2am so I apologize for typos, grammar mistakes and if things don't make any sense. Feel free to ask questions in the comments below. I unfortunately cannot help you if you use different variations of LEDs battery method.
Other posts related to the Infinity Gauntlet:


Awesome work. It looks great.
ReplyDeleteThank you!
ReplyDelete