Showing posts with label geeky. Show all posts

Thursday, July 25, 2013

SDCC Highlights: Day 0 & 1


I have way too many photos I want to post and things I want to talk/blog about but I decided it would take too much time and I would  probably bore everyone.  So instead, here are my highlights.

Badge pick up. 2nd line of the day.  The first line was outside in the car waiting to get in for parking.  >.<

I don't own a wig holder so I used 4 gatorade bottles.  :)

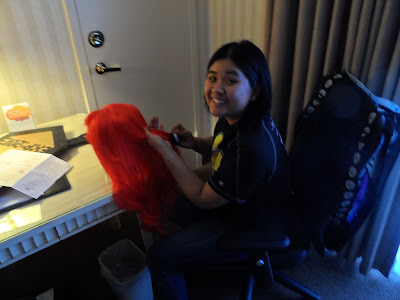
Brushing my hair.  :)

Monday, January 14, 2013

Infinity Gauntlet - Assembly & Completion


Alright, so after you have the LEDs wired up and ready to go you're ready for the next steps.  I don't have many pictures of this because I did it all in less than 24 hours to make sure I had it ready and wrapped in time for Christmas, but I'll try to walk you guys through the steps the best I can.

Now that you have your rivetspaper prototype, and LEDs ready to go the next step is to actually assemble the gauntlet using your metal....right?  Nope!  I did it with poster board and ArtEmboss Aluminum!  I don't have any pictures of a few of my products/materials I used for this process so I'm going to link them up here below.


*Note*: For the Acrylic Gems I ended up buying 2 bags in store.  As the description in the link says, the bag includes assorted colors so you don't know what you'll end up with.  Purple was very hard to find so I sat there in the store trying to flip the gems around in the bag until I could get a clear view of what color they were.  I ended up buying 2 bags because 1 had purple and 1 had red.  

Also, since there is no yellow gem in that pack, I used a yellow fabric for the back of the white gem and a yellow highlighter....It'll be our little secret, okay?  I think yellow nail polish could have worked too.  The backside of the gems are silver metallic which I sanded off with sand paper.  I probably didn't need to do that since the LEDs are so bright they could have shown right through it, but I like how it turned out.

Thursday, January 10, 2013

Infinity Gauntlet - LED wiring


I'm sure this is the moment you've all been waiting for!  LED wiring for the Infinity Gauntlet.  First off I want to give a big thanks to my friend Ron for helping me clean up the LEDs.  And also for teaching me about lemons!  I'll get more to that later.  Before I start with the step by step tutorial, I have to let everyone know that going into this project I had no knowledge LEDs, resistors, wiring, etc except what I have learned and forgotten from high school and college.  So even if you have no knowledge of wiring up LEDs, I'm hoping that with this tutorial, safety, and a little bit of practice, you too can have LEDs to light up your infinity gauntlet.


What you'll need (not all items pictured):
  • Soldering Tool Kit (Should have Iron, soldering wire at minimum)
  • 6 white LEDs (Radio Shack #276-0320)
  • 6 resistors (160-Ohm 1/4 Watt Carbon Film Resistors)  They come in a 5 pack...
  • 1 AAA qty4 holder with on/off switch included
  • Lemon juice aka Citric Acid Flux
  • Wire cutters
  • Hookup Wires (Red - Positive & Black - Negative)

Optional
I basically walked into Radio Shack and told them what I was trying to do and how many LEDs I needed.  The associate was really helpful and at the same time not.  He was able to put my request into his little wizard and it popped out the necessary items I need, and the circuit it should be in, but beyond that he wasn't much help.

Here are the Youtube videos that I believe will be helpful for you:
Series and Parallel Circuits (I didn't watch this until I messed up the circuit so make sure you watch this first!)
LED Tutorial - Part 1
How and WHY to Solder Correctly

Friday, December 28, 2012

Felt Plushie R2D2 - Part 2


Alright, so we're right where we left off after Part 1 of the making of the R2D2 Plushie.  You have the 3 blue pieces sewn into the top head and other parts are pinned in place ready to sew.  I took a lot more pictures during this process since I found some parts hard to understand or explain so hopefully the amount of pictures will help.  I probably should have split it into 3 parts, but you'll just have to bear with me and the really looooong part 2 post.  So here goes part 2!

The next step will be to sew close the bottom part of the circle onto the head piece.  This means only the circumference of the top circle will be sewn down.  The slit down the middle of the head will be open.  Stuff the head so it's at 80% capacity to help you keep it's shape while you sew it close.

You will eventually close the whole top circle securely onto the head panels.  

Wednesday, December 26, 2012

Felt Plushie R2D2

This is my first attempt at making a felt plushie doll and I'm really happy with the results.  He's 100% handmade with love.  His head turned out a little smaller than I had hopped and his legs are a little buffer than normal...And I probably could have done without the swivel head but I thought it added a nice unique touch and I'm so happy he can actually support his own head (sometimes...).  Despite me pointing out what I think are his flaws, everything turned out okay because he's super cute in his own little way. ^_^

Here's what you'll need:
  • Buttons (1 big black one, some small black, red and white ones)
  • Blue ribbon (I used some 5/8" ribbon left over from my Pearl Bracelet Project)
  • Polyester Fiber Fill
  • Blue, white, grey felt - I was lucky enough to pick some up in the remnants bin
  • Sewing stuff
  • White, blue, grey thread (You'll probably need to switch out your thread to match the felt color you're sewing so more than 1 needle is a plus)
  • Cotton Cable Cord (I had left over from my Hex Nut Bracelet)
  • 1 rivet if you want a swivel head
  • A small piece of Poster board cut out for the feet
  • Basic hand stitching knowledge - stringing needles, stitching & knotting threads
I was fortunate enough to have the majority of the materials laying around the house already.  The remnants and the fiber fill I bought at JoAnn's on Black Friday and since they had 75% off remnants and 50% off fiber fill I left with everything (and some other stuff) for about $6 which was very exciting!  Make sure to always look in the remnants bin and keep an eye out for sales and coupons!