

Original Pin: http://pinterest.com/pin/231724343298464677/
Pin Rating: 3
Difficulty: Medium
Duration: 40 minutes
When I saw this pin I was in awe of how pretty it looked and easy it seemed to be to make. After I clicked on the link I realized that it was part of a round up blog post and didn't actually include the original link or instructions. Clicking on the link provided led me to a Pintrest pin and basically I went in circles. Looking at the link on the website I see that it's a website in another language that I don't see any content. So all in all I felt disappointed in the original pin which is why I gave it a 3 pin rating. So I did this pin going off of the pictures alone and felt like this pin is one of the first pins where it looked really easy but wasn't when I actually tried to do it. Overall result is a great DIY bracelet, but it took a little patience and made me wish I had a 3rd hand to help. Hopefully this tutorial will help you guy out a lot better than the original pin I found floating around on Pintrest.

- Stretch Magic cord
- Pearl beads
- Ribbon
- Needle with a big enough hole to thread the stretch magic string
- Scissors
You can probably do this with a regular thread instead of the stretch magic cord if you're making it for yourself so you can make the exact adjustments, but since I'm making these as gifts I wanted some stretch room just in case. :)

Also, I didn't have a needle with an eye big enough to thread through so I had to use this little dime-like contraption to tug it through.

Since the stretch magic cord was thick it held in place and didn't move unless tugged which helped through the whole process.

I measured out about 10 inches of the ribbon then started a little loop and pulled the needle and string through. Pull the cord through to the appropriate lenght and then tape the ends down.

Next put a pearl in.

Here's a picture of the taped end of the cord (I didn't want to cut the cord in case I didn't measure the bracelet properly) and a few loops. So I had the most trouble starting the actual ribbon and pearl to the right length that I wanted. The taped really helped.

I also found that it helped to loop the pearl through then lay the bracelet flat and pinch the piece of ribbon to the appropriate length that you want.

Once you see the appropriate height of the ribbon piece keep and eye on where you will string the needle through.

Continue these steps until you get to your desired length. (Wrap it around your wrist for good measure)

Once you have the right length, add in one more ribbon loop for good measure and looks. Cut the cord on the end (Tip: not the end with the tape) and knot it.

Once you knot both ends of the cord wire, knot the actual ribbon.
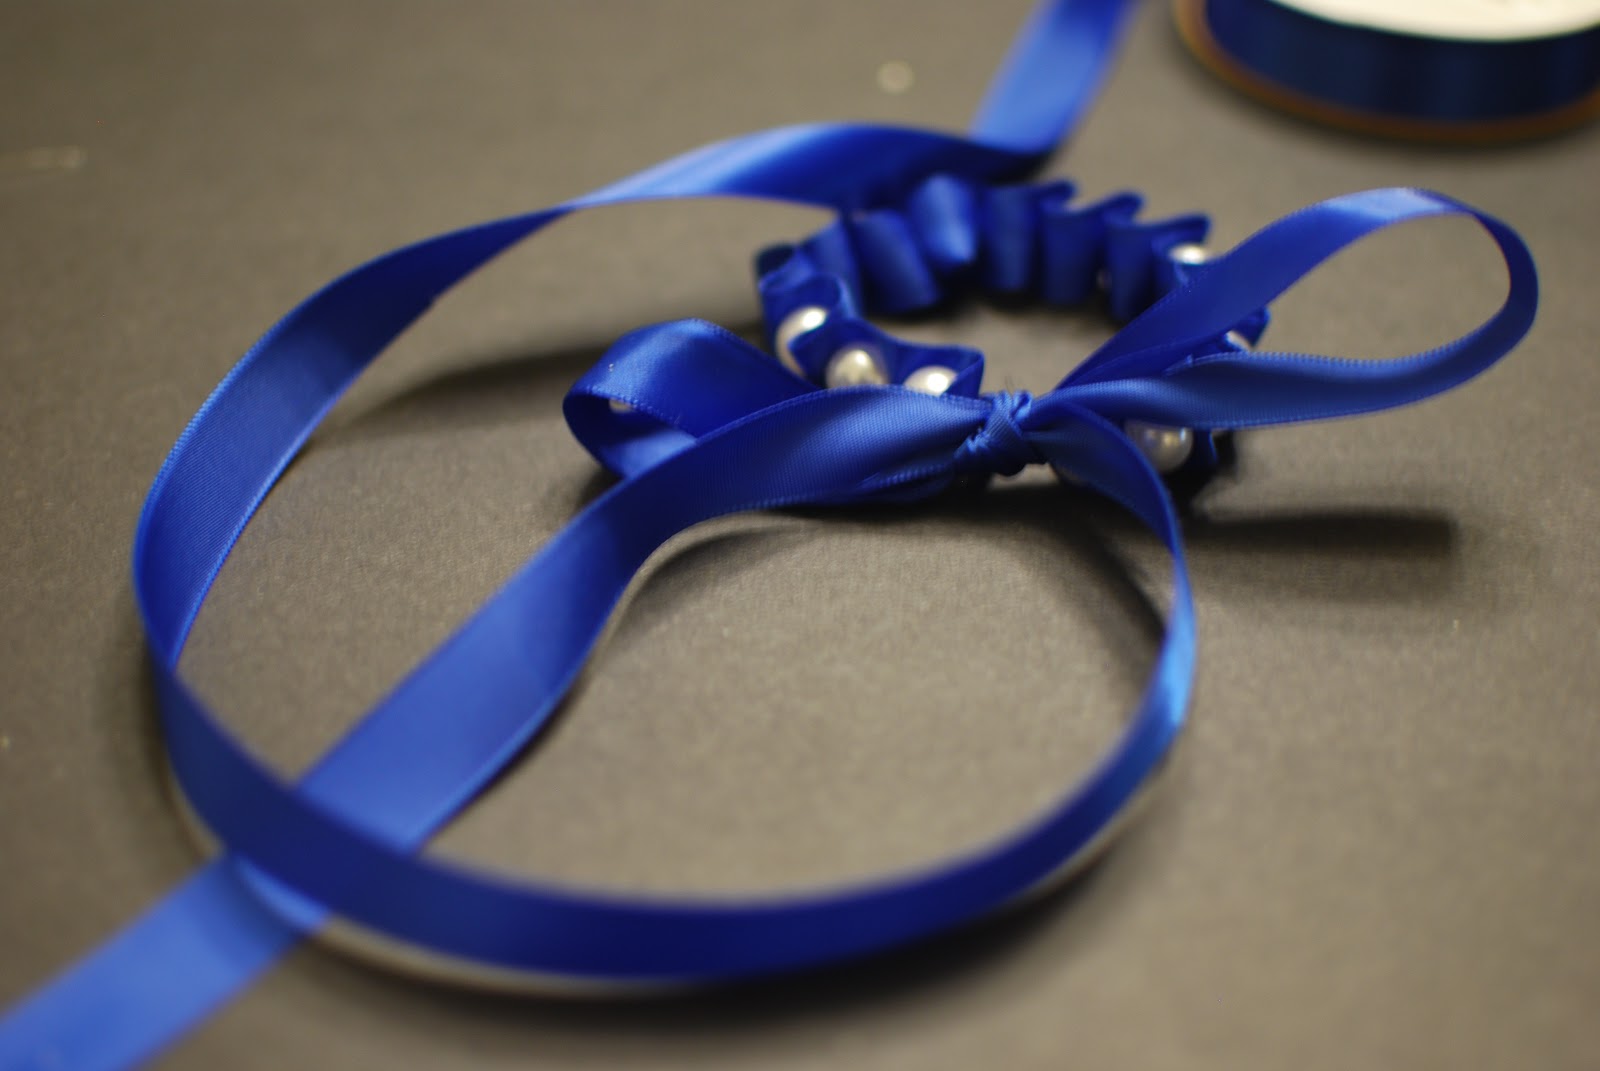
Tie a bow with your ends and trim the ends.

And you're done! Time to pick out a nice party dress to wear it with.

Pin me :D

No comments:
Post a Comment