Original blog: Nestled
Pin rating: 4.5
Difficulty: Easy
I love no sew projects and this one in particular was quite fun. I definitely had an easier time with this one than I did with the pearl ribbon bracelets. Also loves that this little project required me to make a trip to the hardware store. I just get all giddy when I'm in there. That place is so amazing and can inspire so many DIY projects for the home, or in this case jewelry. My next blog post is also going to be a jewelry piece that includes material from the hardware store so check back on Wednesday.
So I struggled a little at first in understanding the instructions because it mentions to thread ribbon up or down through the washers but since it has the pictures it made it a lot easier to understand. I'm going to use the instructions from the Nestled blog and try to clarify anything I thought was confusing. It was mostly step 1 where I got confused but everything else was straight forward.
- 20 pieces of 7/16" flat washer (50 pack at Orchard Supply Hardware for ~$3.00)
- 1 1/2 yard of 5/8" wide ribbon
"Step 1: Thread your ribbon up through washer #1, leaving enough ribbon on the end to tie the necklace when it's finished."
Make sure you cut at least 1 1/2 yard of ribbon. Looking at the ribbon in front of you, you will be working from the left side to the right. Take the right end of the ribbon and thread it from the bottom up into the washer. Make sure that you have enough ribbon on the left end to tie the necklace. The original blog suggested 1 yard of ribbon but I found that it wasn't enough for the length I wanted.
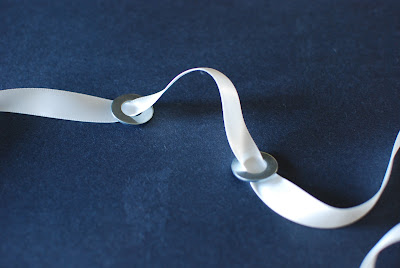
Here's a close up of washer #1
"Step 2: Thread the ribbon down through the top of washer #2."
From here on out you will continue to use the right side of the ribbon to thread it through the washers. Thread the ribbon down through the top of washer #2 and pull ribbon out towards the right.
Here's a close up of how the ribbon looks after step 2.
Step 3: Thread the ribbon back down through washer #1.
Lift up washer #2 or move it aside to thread the ribbon back down through washer #1.
"Step 4: Pull the ribbon tight, so washer #2 is laying flat on top of washer #1."
Once the ribbon is pulled down through washer #2 this is what it should look like.
"Step 5: Thread the ribbon back up through washer #2."
Make sure to pull the ribbon tight on each step.
"Step 6: Repeat steps 2 through 5 for each additional washer."
Once you've finished threading your washers make sure to burn and frayed edges and tie the ends into a bow. I personally didn't cut off any excess because I like the excess ribbon look down the back. If there are any instructions you don't understand let me know and I'll try to clarify it. If you've made your own I'd love to see it too!


No comments:
Post a Comment