

Pinspired by: http://pinterest.com/pin/231724343298132064/ & http://pinterest.com/pin/231724343296961753/
This blog post is a little different because I didn't actually follow any step by step blog tutorial from a pin. This project was actually inspired when I was shopping and there was a really expensive shirt that I wanted to buy and just couldn't afford. I decided to try my luck at making it and I think it was a success! I looked over the two DIY t-shirt modified pins on pintrest and got a feel for how they converted their shirts and kind of experimented with it until I was satisfied with the look. I hope you like the final result as much as I do! I don't have the picture of the final shirt being worn since this is a gift but I'll make sure to get a final photo and post it later.

- Sewing machine & sewing stuff (needles, thread, scissors, fabric pencil optional)
- Cotton T-shirt 1 size larger than what you typically wear
- Ribbon

Flip the shirt inside out so that if you make any lines with your fabric pencil it won't be easily visible. It also helps it to be inside out to cut the sleeve lines out. Cut the sleeves out following the seems. For the neckline make the cut close to the neck line and cut under it and round it out to the corner.

Next you want to fold the newly cut edges of the top of the shirt in 1 cm then again another 1 cm in so that you're hiding the rough edges. At the corner I placed the ribbon in the fold ribbon side up.
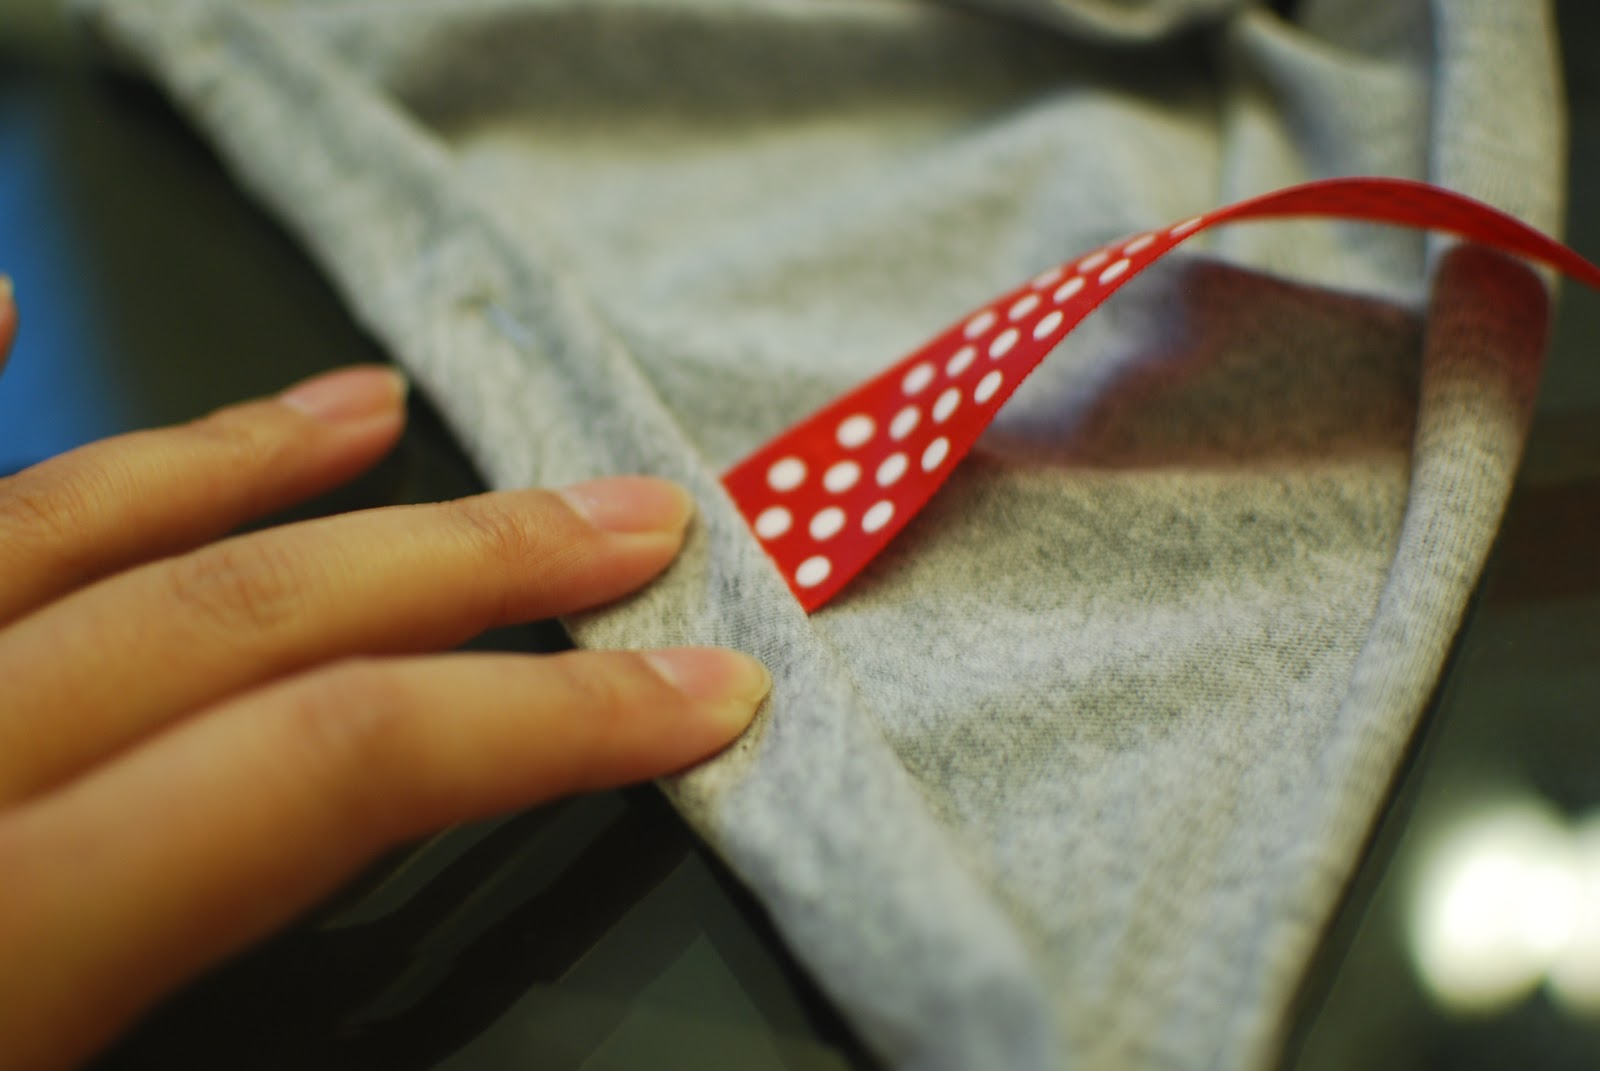
Then closed it.

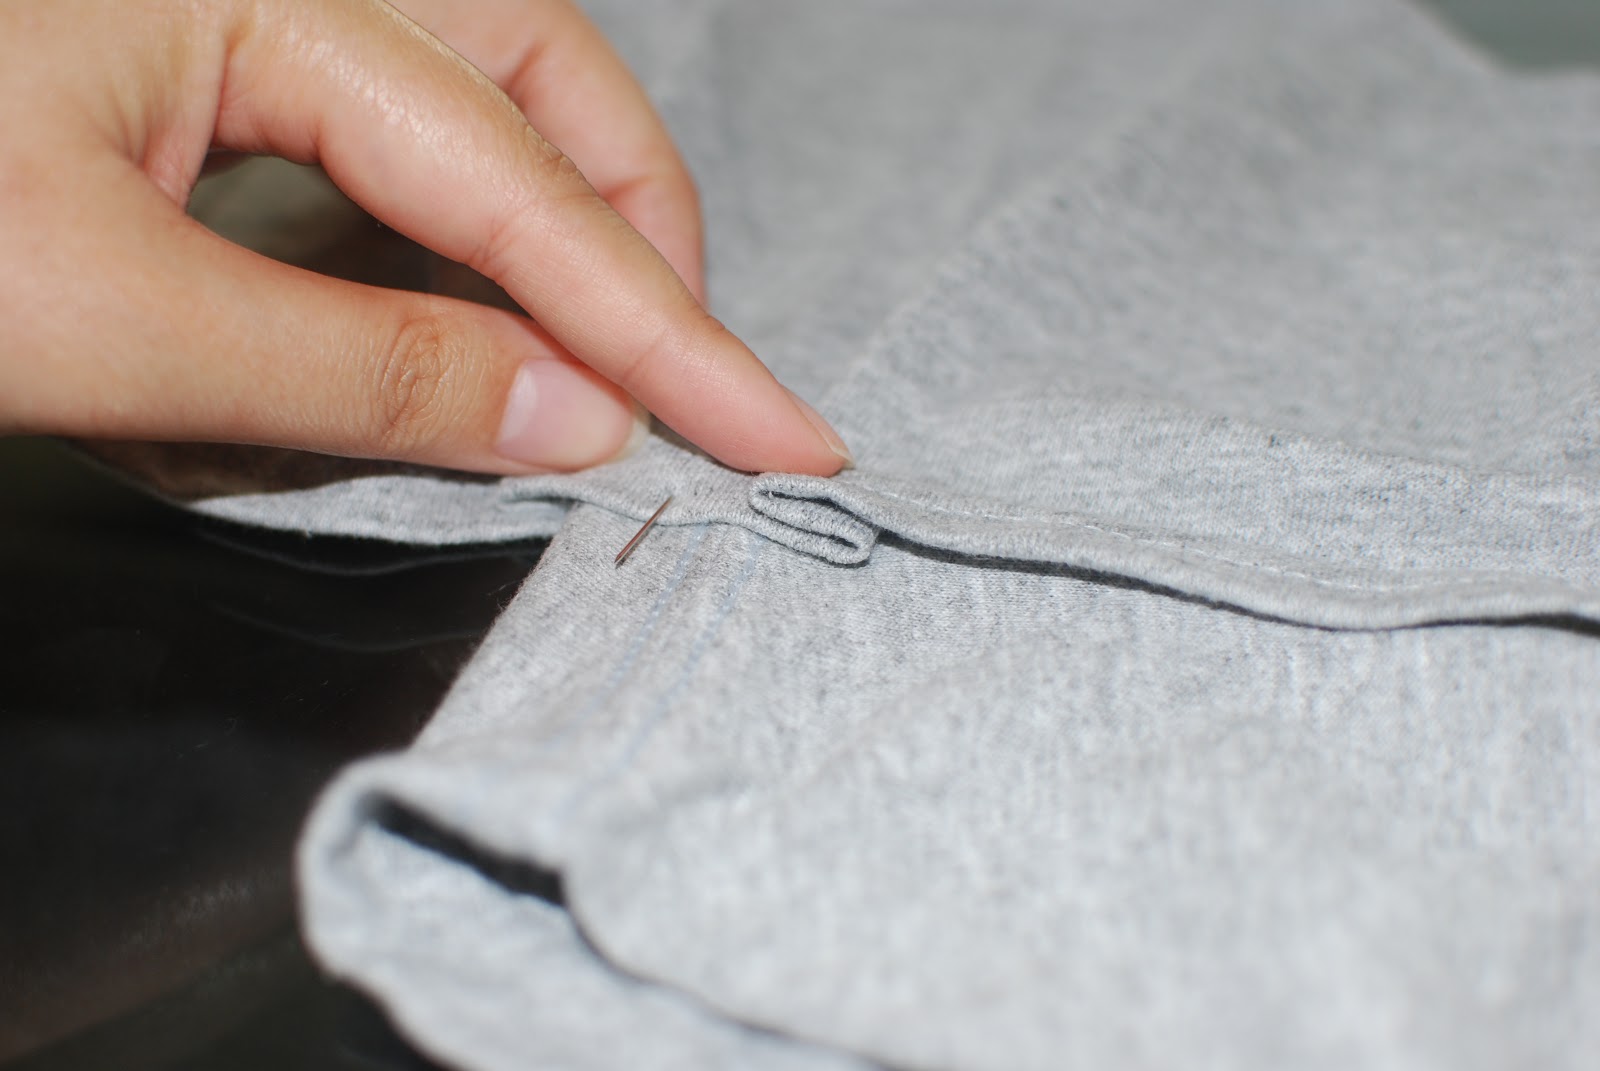
And then pull the ribbon up again towards the top of the shirt. I did this so that there will be no open edge of the ribbon and it also serves as a sturdy shoulder strap. For the ribbon sew the bottom edge as well as the top edge of the shirt so it's reinforced in two spots.

Next sew close all the rest of the open edges of the t-shirt. The rounded edges will be tricky but it's doable. (This includes the sleeve area)

This is what the ribbon looks like all tied up. ^_^

Next, take the shirt sleeves and cut it along the short side of the sleeve. This is most likely where the seam is. You can leave the original t-shirt sleeve edge as is.

Sew the cut edges in to give it a cleaner look and prevent it from fraying. I love how it naturally gives it a rippled look.

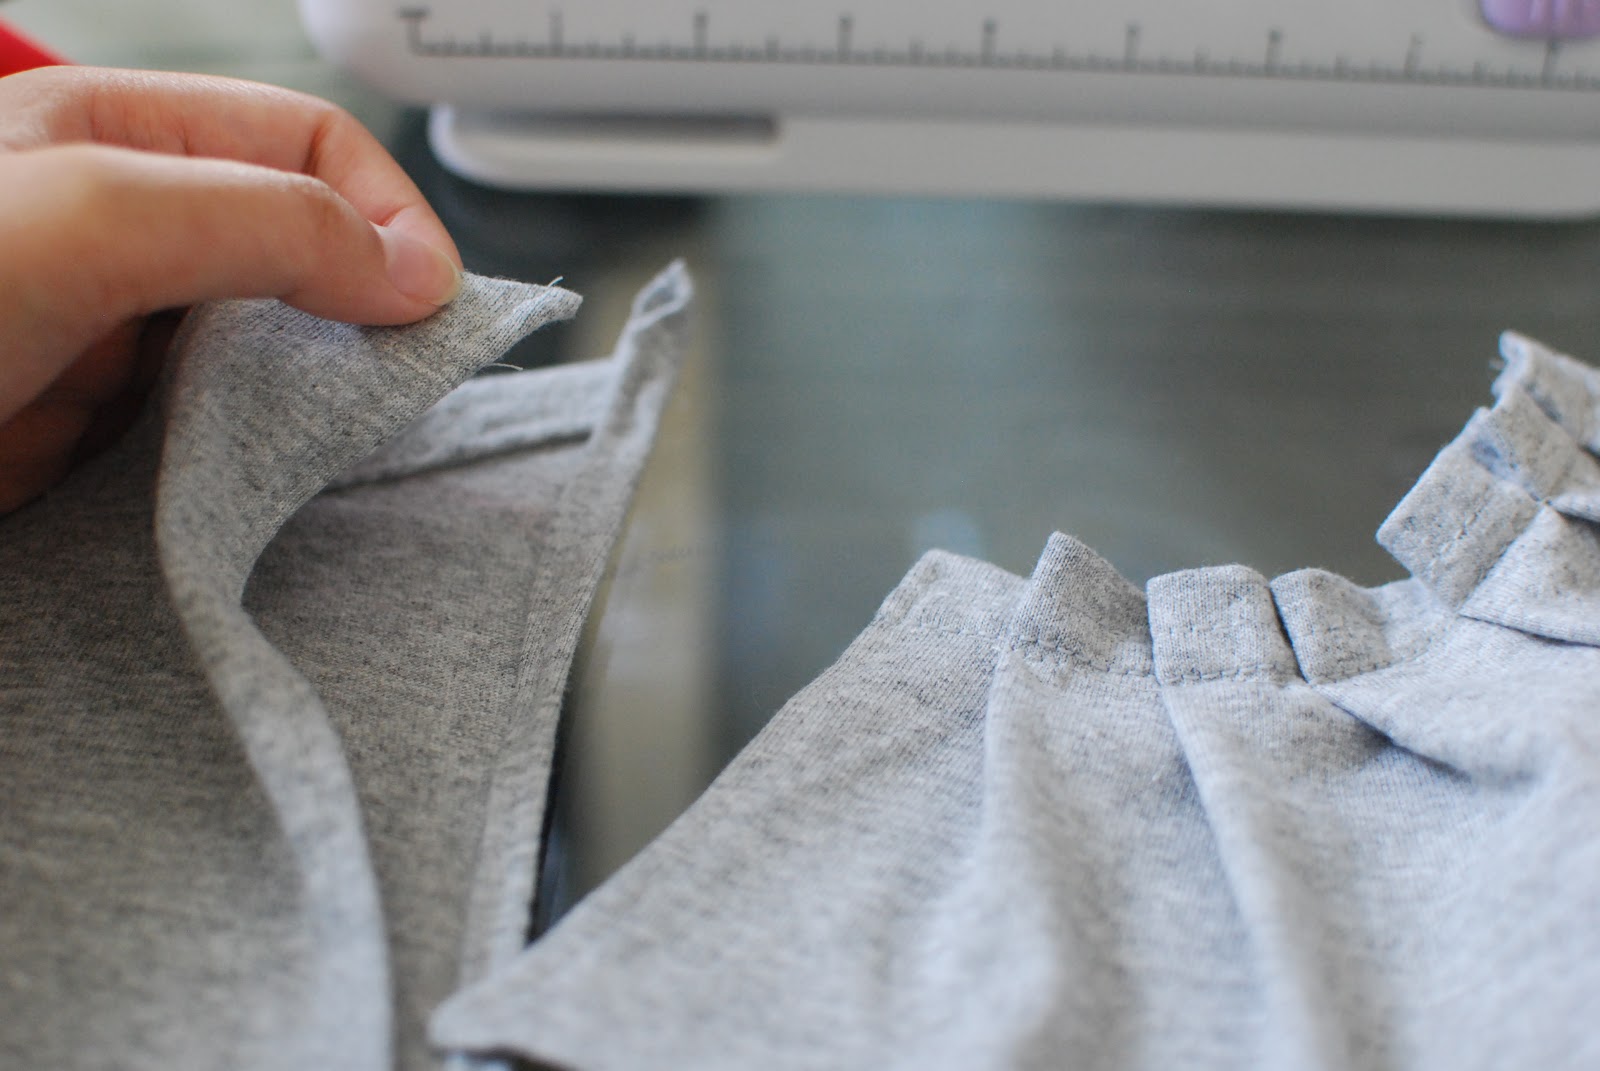
Next step to attach the ruffled sleeve to the shoulder area - the completed shoulder side. Take the cuff and find it's center.
Pin the center to the top shoulder section of the shirt and then add the ruffled layers.

Continue adding the ruffles on both sides and make sure it's connected on the edge to give yourself more arm coverage.

Sew it down and it should come out looking something like this.


For the 2nd cuff, sew the ruffles first since you're not connecting all of it directly to the shirt.
After you sew your ruffle cuff, sew 1 edges of the cuff to the open shoulder. Then sew the 2nd edge to the other shirt end.

In the end your cuff should look like this.

And there's your final shirt! It's a off the shoulder ribbon t-shirt.
No comments:
Post a Comment