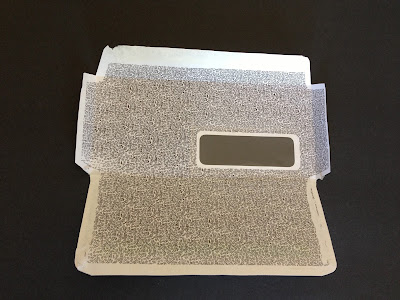
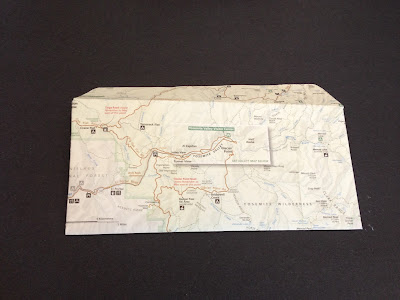
I never paid attention to the inside of the junk mail envelope until I started working with EcoMonster. She showed me the beauty of the inside of the junk mail letters and how to use them for scrapbooking paper or designs for cork coaster. Today I'm posting some quick photos on how to convert your own junk mail into fun and beautiful envelopes. I recently used this envelope to send to my pen pal. :) Yup, you heard me right, my pen pal. I joined the Post Mark Society via www.postable.com earlier this summer and have been exchanging letters with my pen pal. It basically a pen pal group for bloggers created by bloggers. :)
What you'll need:
- Junk mail envelope
- Park Maps (or any other sturdy scrap paper you have laying around)
- Scissors
- Glue stick
- Pen
Take your junk mail envelope and carefully & slowly open it up flat making sure not to tear any sides. This will be your template for your new envelope.
Pick out the area/image that you would like to have displayed on the outside of your new envelope. Once you've decided, place the template so that it's white side up and trace the envelope designs onto your map.
Cut out the shape of your new envelope.
Flip it over and fold the edges in copying your envelope template.
Test fold your envelope and then glue down the flaps. I didn't realize I don't have a picture of this step so I will try to explain it as best I can. Fold the side flaps inward first. Put glue on the top side of the flaps. Fold the bottom flap up and press the glued sides firmly so that it sticks.
You envelope should now look like this.
Inside is still able to open and allow for a letter to be put inside.
I cut out some card stock and added it to where the Addressee/"To" will go to ensure that it's legible. If you have white sticker labels it would be better to use those, but I used what I had on hand. And now you're done and ready to mail off your letter!
One other fun thing to do with your template once you're done with it is to glue it back together inside out! It'll give you a whole new design and you're doing your part to help recycle paper. :)


No comments:
Post a Comment