Monday, December 31, 2012

DIY Spray Painting for Rivets (or any small objects)

Happy New Year's Eve!  So for the next couple of post I'm probably going to mix it up with the Infinity Gauntlet building post & other random posts so that I don't bore everyone isn't interested in the Infinity Gauntlet building.  My boyfriend is having a New Year's Day board game get together tomorrow at his house and I decided it'll be the perfect opportunity to whip up some pinspired decoration and decorate with a Game Night theme so those blog post will also be scattered throughout the next couple of post.

For today's post I'm going to start out with a simple yet effective pin I saw (45 weeks ago!) on Pintrest but finally had a chance to try it out.  The original pin was for spray painting pinto beans for decorations  and when it came time to paint the rivets gold (since I couldn't find any cheap gold ones anywhere else) I knew this method would be perfect to paint the rivets....Or at least I had to try the method out since it seemed so simple - and it was!


Pin Rating: 4.5 (I'm sure it would have been a 5 if I was actually using pinto beans)
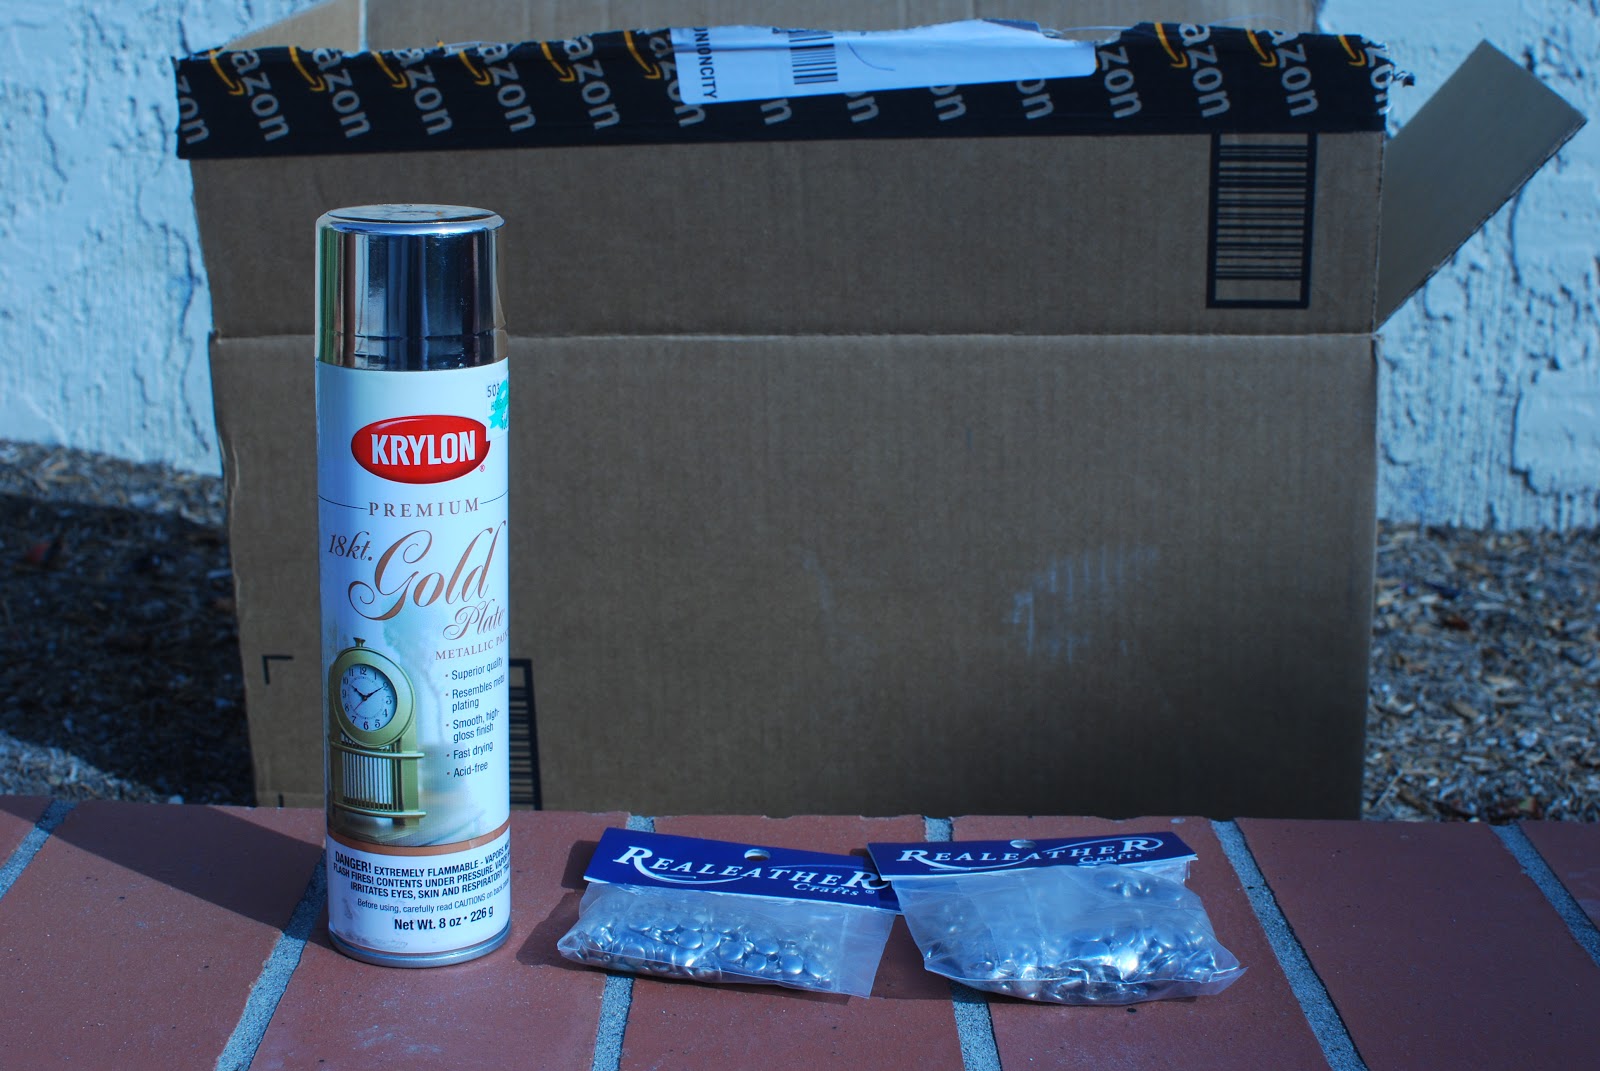
  • Box
  • Metallic Gold Spray paint
  • Pack of 3/8" Nickel Rivets 
  • Pack of 1/4" Nickel Rivets
  • Mask or handkerchief to wear while painting
I bought everything, except the box, at Hobby Lobby.  I really wanted to look and feel the rivets for myself to test out the size.  You'll need the 1/4" rivets for the spots where you rivet two plates together (and only 2 plates). The 3/8" rivets are for spots where you need more reach to rivet through the glove and the plates of the gauntlet.  Note: Not all spots that you rivet through the glove will require the longer rivet.


What's nice is that they packaged the top and bottom pieces separately.

Friday, December 28, 2012

Felt Plushie R2D2 - Part 2


Alright, so we're right where we left off after Part 1 of the making of the R2D2 Plushie.  You have the 3 blue pieces sewn into the top head and other parts are pinned in place ready to sew.  I took a lot more pictures during this process since I found some parts hard to understand or explain so hopefully the amount of pictures will help.  I probably should have split it into 3 parts, but you'll just have to bear with me and the really looooong part 2 post.  So here goes part 2!

The next step will be to sew close the bottom part of the circle onto the head piece.  This means only the circumference of the top circle will be sewn down.  The slit down the middle of the head will be open.  Stuff the head so it's at 80% capacity to help you keep it's shape while you sew it close.

You will eventually close the whole top circle securely onto the head panels.  

Wednesday, December 26, 2012

Felt Plushie R2D2

This is my first attempt at making a felt plushie doll and I'm really happy with the results.  He's 100% handmade with love.  His head turned out a little smaller than I had hopped and his legs are a little buffer than normal...And I probably could have done without the swivel head but I thought it added a nice unique touch and I'm so happy he can actually support his own head (sometimes...).  Despite me pointing out what I think are his flaws, everything turned out okay because he's super cute in his own little way. ^_^

Here's what you'll need:
  • Buttons (1 big black one, some small black, red and white ones)
  • Blue ribbon (I used some 5/8" ribbon left over from my Pearl Bracelet Project)
  • Polyester Fiber Fill
  • Blue, white, grey felt - I was lucky enough to pick some up in the remnants bin
  • Sewing stuff
  • White, blue, grey thread (You'll probably need to switch out your thread to match the felt color you're sewing so more than 1 needle is a plus)
  • Cotton Cable Cord (I had left over from my Hex Nut Bracelet)
  • 1 rivet if you want a swivel head
  • A small piece of Poster board cut out for the feet
  • Basic hand stitching knowledge - stringing needles, stitching & knotting threads
I was fortunate enough to have the majority of the materials laying around the house already.  The remnants and the fiber fill I bought at JoAnn's on Black Friday and since they had 75% off remnants and 50% off fiber fill I left with everything (and some other stuff) for about $6 which was very exciting!  Make sure to always look in the remnants bin and keep an eye out for sales and coupons!

Monday, December 24, 2012

Sneak Peak of my Xmas Crafting Gifts

Happy Holidays everyone!  I hope everyone is enjoying some time off and spending it with family and friends.  This year my family celebrated Christmas a little early so it feels nice to be done with all my Christmas shopping and crafting already.  Granted it was a mad rush to finish all the projects in time since I was pretty ambitious, but it was well worth it!  Since tomorrow is Christmas I'm making today's blog post a little short so I can go back to relaxing, but I did want to provide you with a sneak peak of 2 of my bigger projects I did last week.  These aren't items that you can find on Pintrest but hopefully you will be inspired to pin them and try them out for yourself!


For my brother's girlfriend I made her a felt plushie R2D2 with a head that can swivel!


For my boyfriend I made him a working Infinity Gauntlet.  For those that don't know what that is, check it out by clicking the Wikipedia link below.  Credit for the original gauntlet design goes to: David J. Guyton.  I purchased his template and made some slight adjustments so that I can add the gems to the gauntlet.

Photo Credit: Wikipedia 

Blog post for this Wednesday & Friday will be for R2D2 plushie.  Next week I will blog about the Infinity Gauntlet.  Stay tuned for some serious crafting updates!

Wednesday, December 19, 2012

DIY String Christmas Tree Decoration - Part 2


Alright, here comes Part 2 of the project.  =D After letting it dry the whole night we came back downstair and took a look.  

Everything seemed stiff and holding up fine so it was time to take the paper off the cone.  I love how it still holds its shape without the cone.  We did run into some difficulty taking the cone off because the bottom of the party hat was a little sticky still where the bottom trim was originally. To remedy that just tape over it before you start your project.

So the easiest way to take the wax paper off is to go inside the cone and start peeling the wax paper away on the inside of the tree.  Handle the tree with care since it is fragile.  

Tuesday, December 18, 2012

DIY String Christmas Tree Decoration - Part 1


UPDATE: So after finishing the project I realized that there were a lot of things I learned and wish I had known/tried earlier but didn't.  Please read both Part 1 and Part 2 completely before attempting the project on your own.  Enjoy!

Pin Rating: 2 (for original pin - hopefully with my tutorial it will make this project a 4/5 for you.)

-----

So today's blog post is a little different because I didn't expect it would take this long.  There is a lot of drying and waiting around involved.  This pin was shown to me by a friend and I decided to tackle this pin.  The original pin doesn't have any instructions and the link leads to what I believe is a Russian website so I figured this would be a great DIY post to get the step by step instructions out there.  I had some help on this one which made it a lot easier and fun to make.  But as you can see from the title, this is only Part 1.  I waited for the project to dry overnight and I'll be unraveling it and decorating it later today so expect to see the post up by Thursday on the completed project.

Here's what I'm using:
  • Giant party hat from The Dollar Tree (Or you can use a styrofoam cone for ~$3.99)
  • Tacky glue with brush
  • 3 sets of embroidery floss (.40 each @ Hobby Lobby)
  • Wax paper
  • Scrap booking Snowflakes
*Note: The tacky glue will make your string a shade darker once it dries so keep that in mind when you pick out your colors embroidery floss.

Friday, December 14, 2012

Some completed projects

So I'm taking a mini break in blog posting today to update you guys on some completed projects.  I didn't want to post the pictures since they were gifts, but my friends and I celebrated a little early last weekend and opened up the gifts already.  Here's a final look at 2 of the projects.


For the Scrabble pillow cases I used my own template and fabric marker.  I love the clean look the fabric marker provides for the cases, but unfortunately it uses a lot of ink to fill in the letters.  I'm going to have to use felt lettering for any other pillows I make.  It might take longer, but it's not worth buying a pack of fabric markers just so I can use all of the black.  I'm going to go back to Hobby Lobby or JoAnn's to look for a thick black marker sold individually which might work better for me.

If you would like your own set of Scrabble Pillow cases but don't have the time to make them, I have them for sale in my Etsy shop.


Here's the final design of the Off the shoulder t-shirt.  I designed and hand drew the minnie myself (inspired by Vintage Minnie) using the fabric markers I had purchased for the Scrabble pillow cases.  Isn't it cute?!