Showing posts with label 5. Show all posts

Thursday, October 17, 2013

DIY Circle "Minnie" Skirt


This was my first time working with elastic where it turned out elastic!  Most of the time I end up sewing the elastic and having end up with zero slack to even put it on!  Now after finding this pin and reading through the tutorial and following it step by step I've successfully made my first elastic skirt!

Original Pin: http://pinterest.com/pin/231724343298826745/
Pin Rating: 5


Last month I posted this photo of the a circle mini skirt that I made for the Color Me Rad and mentioned I was going to do a tutorial of it on the blog.  One month later and I'm sitting her writing my blogpost and I still don't have a blog tutorial!  I started making a Vine video as I was making my 2nd skirt and then realized I had made a mistake in my fabric measurements therefore throwing the whole video out the window.  So instead of holding off on this blogpost I decided to just post some photos of the finished product.  The original pin I gave a 5/5 pin rating so be sure to check out the original tutorial by Dana Made It.  She has great step by step instructions and even tells you how to make measurements for a pattern.  I did manage to make a vine on the pattern though, so enjoy it below!


As seen on my Instagram account.

Here's a head to toe shot.  I didn't really put on a dressy top, but thought this T-shirt was fitting. :)

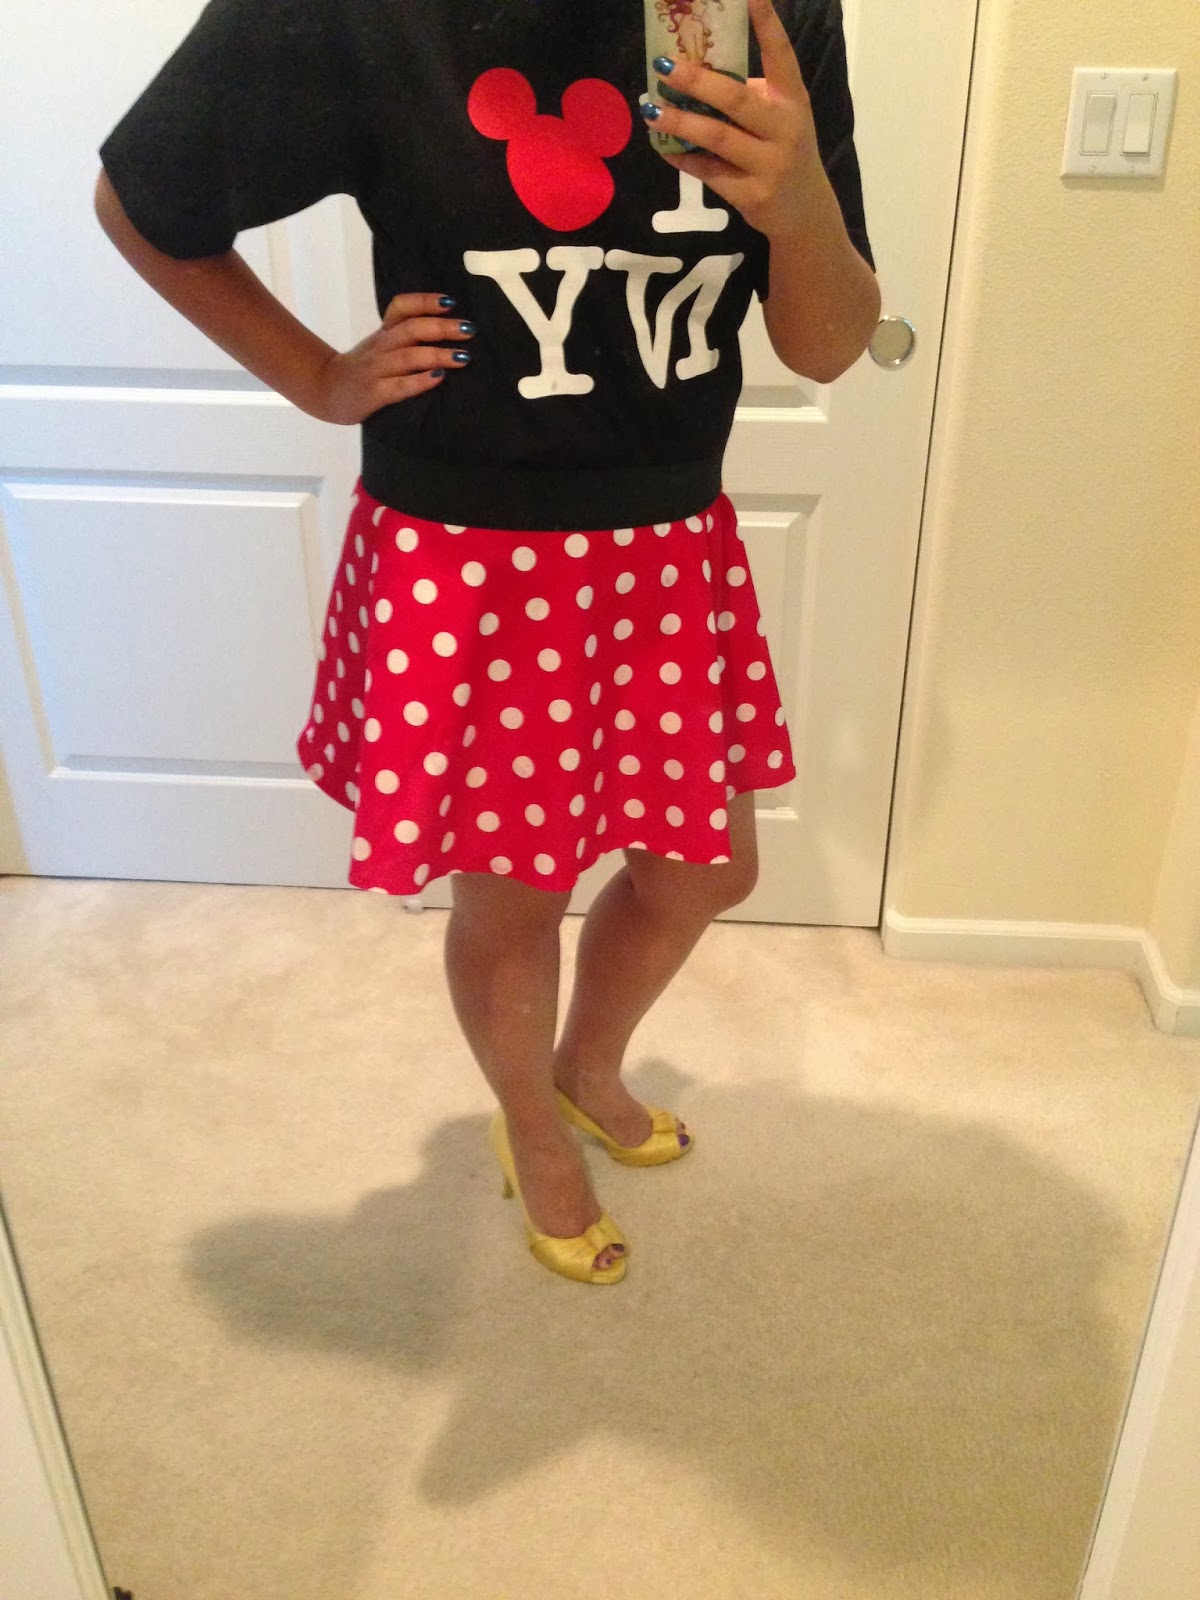
Don't you just love the way the skirt ruffles at the bottom??


Tuesday, April 30, 2013

Ecofriendly DIY Jewelry Cleaner


Pin Rating: 5
Original Pin: Centsible Chick
Cost: $0
Duration: 10-15 minutes

So one weekend while I was sitting across from my boyfriend eating lunch I saw him staring at me with such concentration.  I turned around me to see if he was looking past me, but there was nothing there. When I ask him what's going on he bluntly says: "You need to clean your earings."  Yikes!  If my boyfriend is noticing it then they must be dirty!  So right away I knew I had to find a DIY Jewelry cleaner on Pintrest.  I found one that had the most repins and seem to be quick and doable, and it turned out it was great and I love it!  Common household items that I already had so it didn't cost any money either!

  • Small bowl
  • 1 Table spoon Salt
  • 1 Table spoon Baking Soda
  • 1 Table spoon Dawn Soap detergent (Why Dawn? I'm not sure)
  • 1 cup of water
  • Foil

Wednesday, January 30, 2013

DIY Bedazzled Bib Necklace


So what does one do with all their left over gems used to make the infinity gauntlet?  Make a bedazzled bib necklace, of course.  I found the original pin on I Spy DIY but didn't have any nail polish handy or any Stick It Craft felt so I went to Pintrest and found something that was just as dazzling but with items I already had on hand and I found this one which is pretty simple and quick to do.

Pin Rating: 5
Duration: 30-45 minutes

Materials:
  • Acrylic gems
  • Black ribbon
  • Felt
  • Hot Glue & Hot glue gun
Optional
  • Tissue/napkin template of bib
  • Needle & thread 
I have crazy glue in the picture but didn't use it.


The picture does no justice for the colors of these beads.

Monday, January 21, 2013

Game Night - Dice Cheese Blocks


The dice cheese blocks were pinspired by this pin here.  Unfortunately the pin link itself leads you to a blog round up which leads you to a dead source.  On the other hand, the pin image itself gives you the right idea just not the materials.  So here's my blog post on what I used an how I made it.


Pin Rating: 5

Ingredients:
  • Frozen Grapes (I had grapes left over from the PB+Chicken salad wraps 
    • Frozen grapes are easier to cut in my opinion and it also holds it's shape well.  You can also use olives but since I had left over grapes I used those instead.
  • Cheese block (Or some sort of soft cheese that you can mold)
  • Toothpicks 
  • Crackers
  • Dice (for a sample on where to place grapes if you care for accuracy)

Monday, December 3, 2012

DIY Fabric Flower Necklace

Original Pin: http://pinterest.com/pin/231724343298734063/
Original blog: Little Inspirations

Pin rating: 5
Duration: 30-45 minutes

I love making fabric flowers but I never thought of making a fabric flower necklace until I saw it on pintrest.  This is super easy and such a beautiful end result.  My flower template is a little different from the original tutorial but this was the way I taught myself to make the flowers so I just kind of stuck with it for this tutorial.  I also tried out the Fray Check for the first time and I kind of like it except for the fact that it's noticeable when it dries - granted Fray Check is probably better used for clothes that will be washed.  Also, my pictures this time around are all a tint of blue...I'm not sure why but I tried to fix and adjust them as much as possible so please bear with me as I'm still learning the photography aspect of blogging.


  • Small flower template
  • Fabric
  • Felt (not pictured)
  • Chain
  • Hot glue gun & glue sticks
  • Scissors
Optional
  • Needle & thread
  • Fabric pencil
  • Fray Check
  • Jump rings
  • pliers to break the chain
  • Necklace clasp


Monday, November 26, 2012

Crock Pot Honey Sauced Chicken


Original Pin: http://pinterest.com/pin/231724343298477947/
Original Blog Post: http://mmmcafe.blogspot.com/2010/01/honey-sauced-chicken.html

Pin Rating: 5
Duration: 20 minute prep & 3 hour slow cook in crock pot

I brought this chicken over to a Friendsgiving Dinner party and they were a hit!  This recipe took such little efforts and was so delicious! I doubled the original recipe to bring to the party and used wings since they were easy to grab and eat and I went home with pretty much an empty tupperware.  The beauty of this recipe was that it allowed for me to prep a second dish to bring over to the party as well.  Will definitely be making this recipe again.


  • 2 lbs Chicken Party wings (Can use chicken of your liking)
  •  1 tsp salt
  • 1 tsp pepper
  • 1 cup of honey
  • 1/2 cup light soy sauce
  • 1/4 cup chopped onions
  • 1/4 cup ketchup
  • 2 Tbs vegetable oil (I used olive oil)
  • 1 clove garlic minced
  • Dash of red pepper flakes


Friday, November 2, 2012

Homemade Taco Shells & Bowls


Pin Rating: 5
Duration: 20-30 minutes (7-10 minute cook time per batch)

Mini Rant about the pin: The taco bowl pin drove me a little nuts because when I went to go look at the original instructions there were none!  This was an actual upload by a user so it didn't link up to a website and the pin itself didn't have any instructions.  I'll repin my own picture in a bit with instructions so that there's a good copy out there on Pintrest for everyone to repin.   End of rant. :)

Last month my boyfriend decided he wants to start budgeting a little better so we went grocery shopping.  Some Guerrero corn tortillas were on sale so we grabbed a pack.  Once we got home he decided to have a snack and took one bite of it and almost immediately had a frown on his face.  Apparently these are not the tortillas that he likes.  So since we bought them and we have them I turned to Pintrest for some ways to spice them up a bit so that they're more to his liking.  This quick and simple recipe did the trick!  He loved them and said they were way better this time.  (I made this over at my boyfriend's house and only had my phone so pictures aren't that great but hopefully you can get a good idea of what is going on)

Here's the original pin for the taco shells: http://pinterest.com/pin/231724343298465668/  I used the instructions from this pin to make both shapes of tortilla.

What you'll need:
  • Cooking oil (spray or have a brush handy is recommended)
  • Tortillas
  • Oven rack
  • Muffin tin
  • Oven @ 375°F


First microwave your tortillas wrapped in paper towel for at least 30 seconds.  This gets them soft and flexible so that they won't break as easily when you're handling them.  I didn't have a brush handy or a spray so I poured some olive oil onto a plate and then dipped the tortilla evenly on both sides.